Create an ERC-20 Token Using Solidity
ERC-20 tokens are the most fundamental and essential concept in Ethereum. As the Avalanche community and the ecosystem are growing, new use cases and projects that are running on Ethereum or different chains would be implemented to Avalanche.
Therefore, we will be creating our own mintable ERC-20 token and will mint it to any address we want. The token will be generated on Avalanche C-Chain and will be accessible on that chain. We are using Fuji Testnet in this tutorial.
The article focuses on deploying a smart contract written with Solidity to Avalanche. This is the feature that Avalanche provides us - to be able to deploy any smart contract to the chain and no requirement for a new language specific contract concept to interact. Let’s look at how to create an ERC-20 contract and deploy it to avalanche C-Chain.
Set up Metamask
The first thing we should set is a metamask wallet.
Click to metamask icon on the browser and select the network drop-down menu. Here we should connect to C-Chain. Click to "Custom RPC".
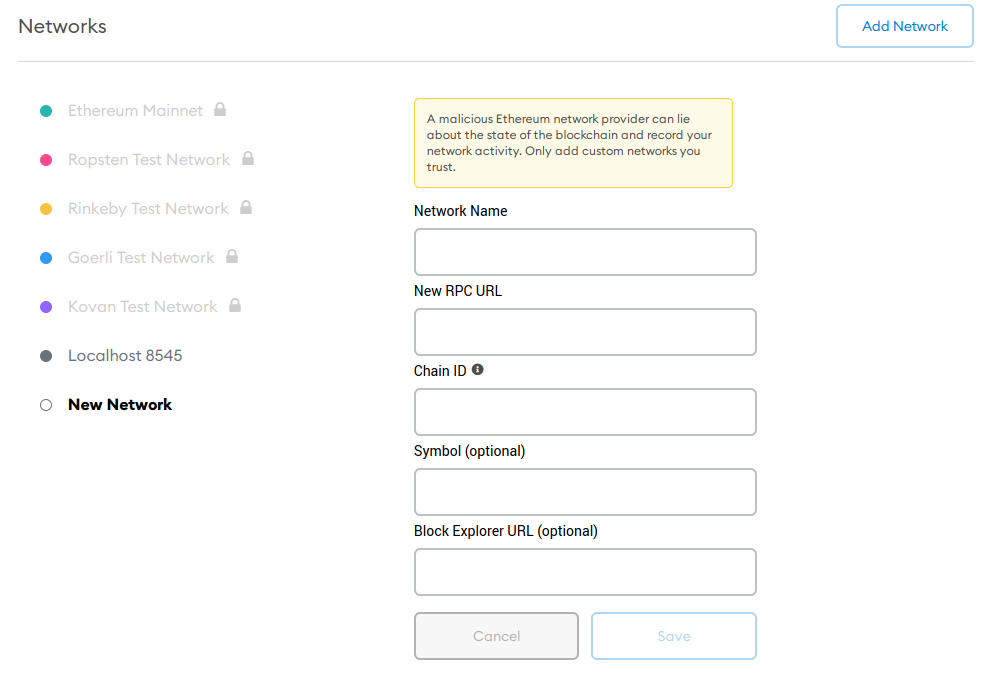
Now, we need to set these boxes with correct values.
- Network Name: Avalanche C-Chain
- New RPC URL: https://api.avax-test.network/ext/bc/C/rpc
- ChainID:
43113 - Symbol: AVAX
- Explorer: https://testnet.snowtrace.io
After setting up all the parameters correctly, we should see this page. For now, we have 0 AVAX.
Fund Your C-Chain Address
For funding on the Fuji Testnet, you can use the Test Network Faucet. Navigate to https://faucet.avax.network/ and paste your C-Chain address.
Create Mintable Token
Now, we can create our mintable token on Remix. Open Remix on your browser or go to this link.
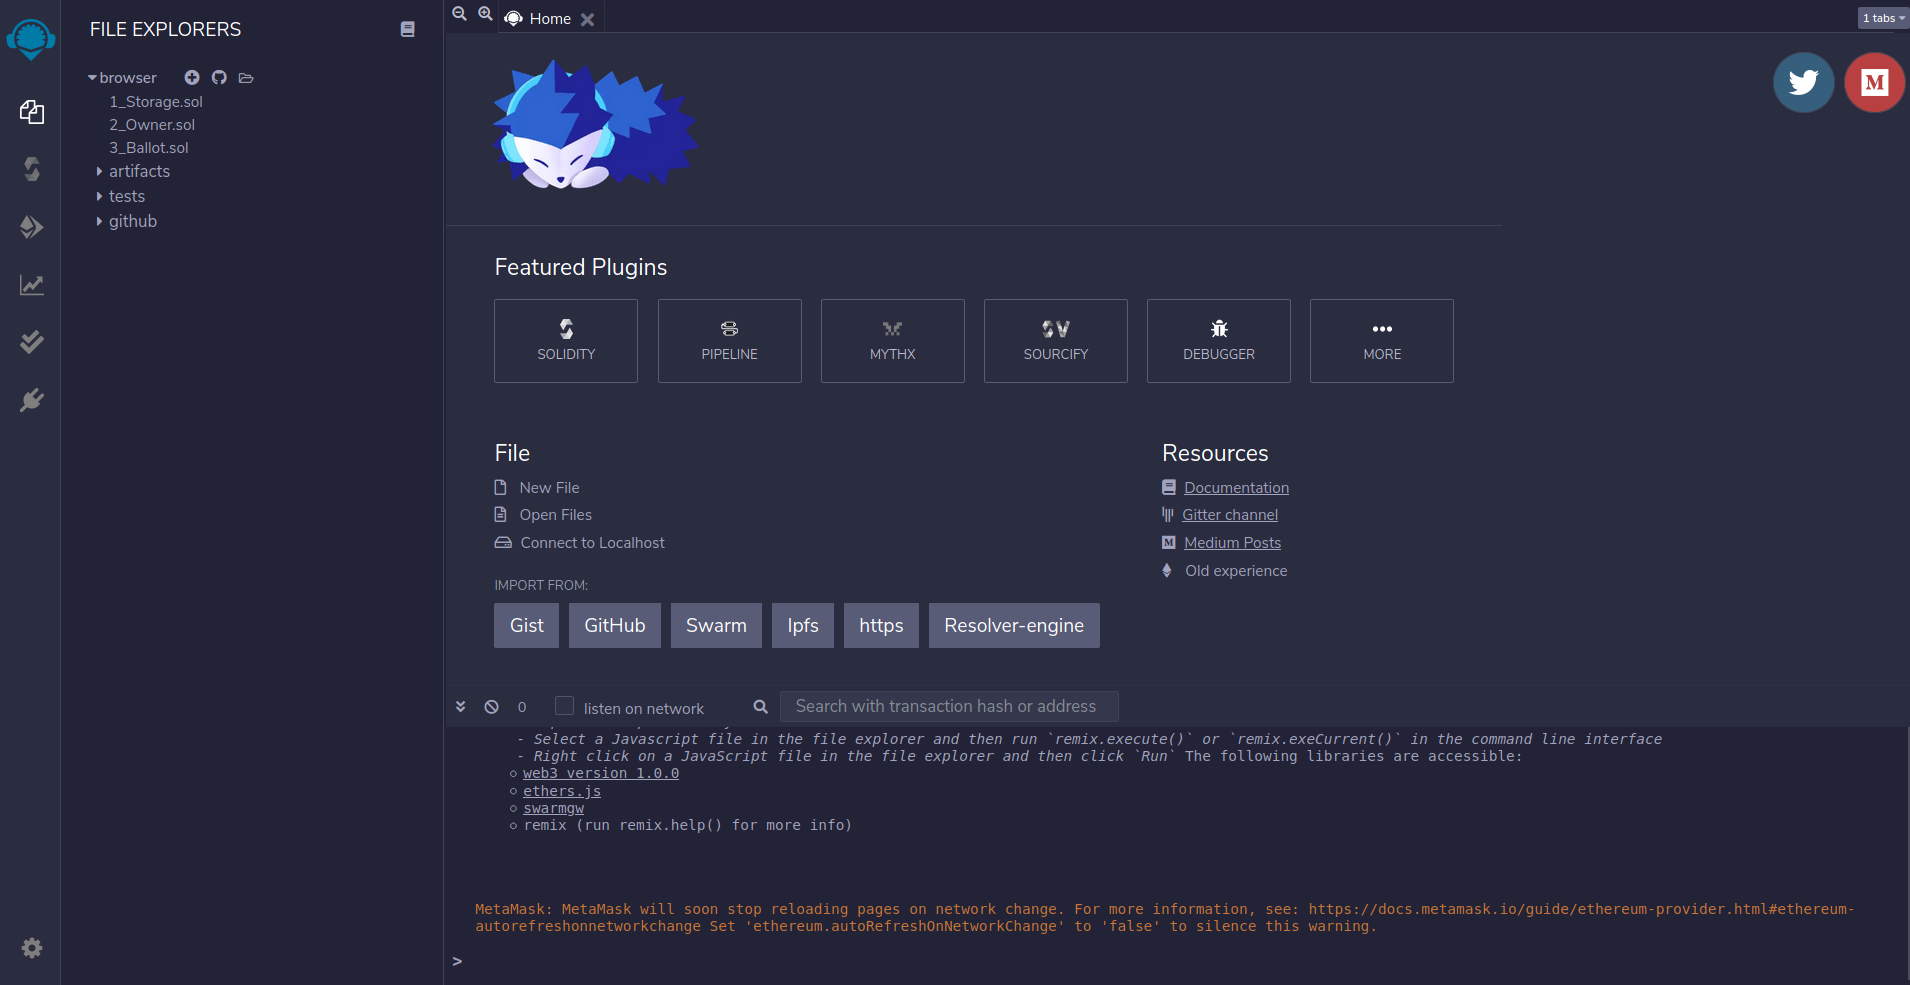
You should view this page. On this page, first, click "SOLIDITY" from "Featured Plugins" and then click the "New File" button. When you click the New File button, you will see a pop-up that requires a file name. You can choose a name or leave the default.
Since we will use an ERC-20 contract from OpenZeppelin, just paste this line to the file and save.
import "https://github.com/OpenZeppelin/openzeppelin-contracts/blob/master/contracts/token/ERC20/presets/ERC20PresetMinterPauser.sol";
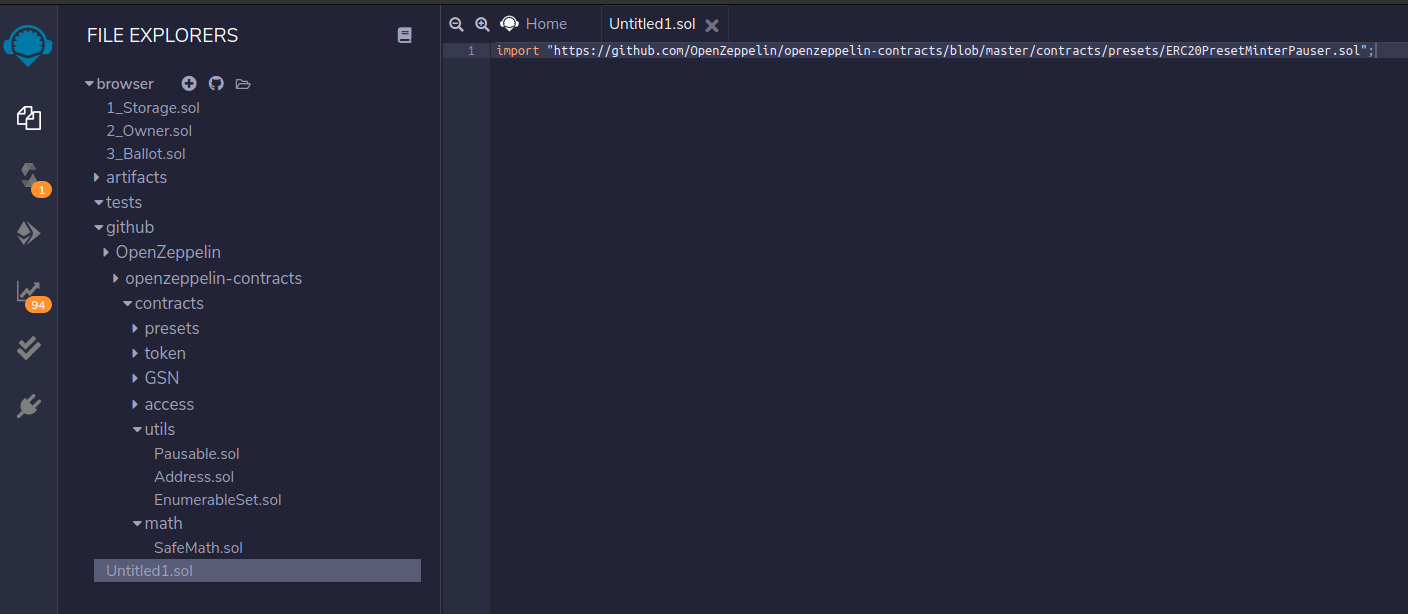
After saving the file, we will see a bunch of files that are imported to remix. This is a remix feature that allows us to import a GitHub contract repository to remix by just giving the URL-link with an import statement.
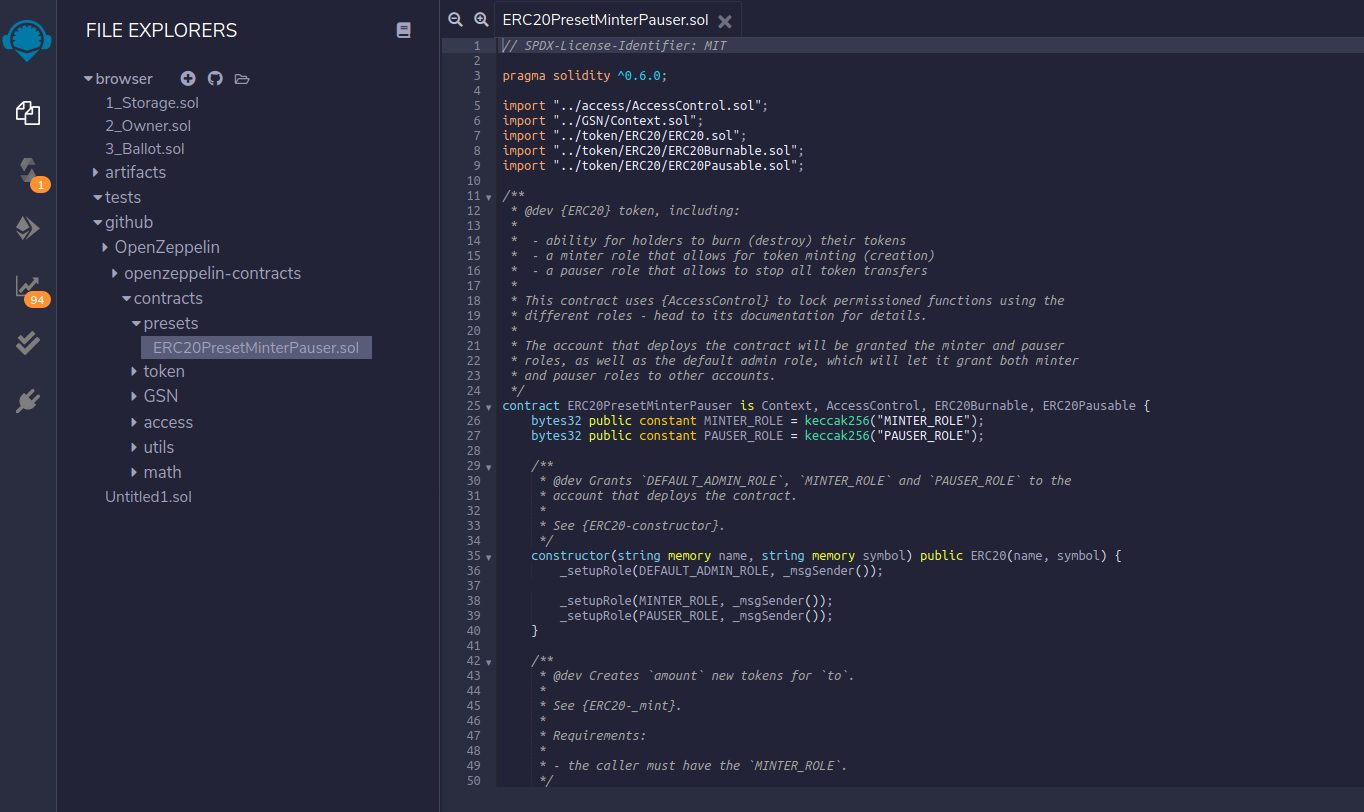
We have ERC20PresetMinterPauser.sol file in the presets. This file is written by OpenZeppelin according to ERC20 standards with minter functionality. After deploying this file, we will be the owner of the contract and thus have the authority and ability to mint the tokens.
Deploy the Contract
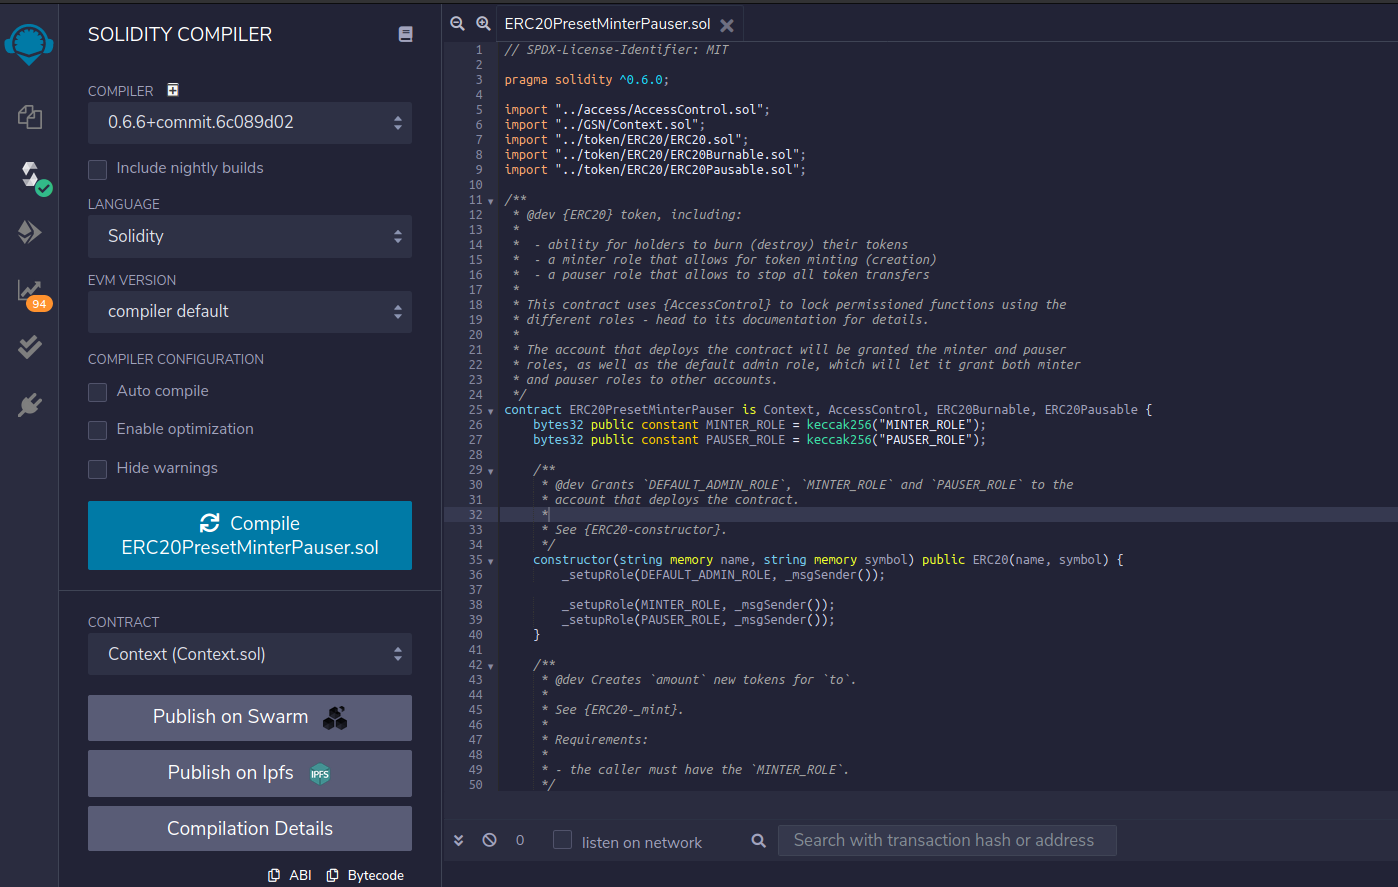
Open the tab with label Solidity compiler and select the solidity version that matches with the solidity version written in file as "pragma solidity …..". The version should be equal to or higher than the file’s version. For example, in my file, "pragma solidity ^0.6.0" is written so the required version is 0.6.0 or higher. As shown, in the compiler the solidity version is 0.6.6, which is ok. After checking the solidity version click the compile button. If you did not change anything in the file, or the solidity version is not wrong, the contract should compile without any errors.
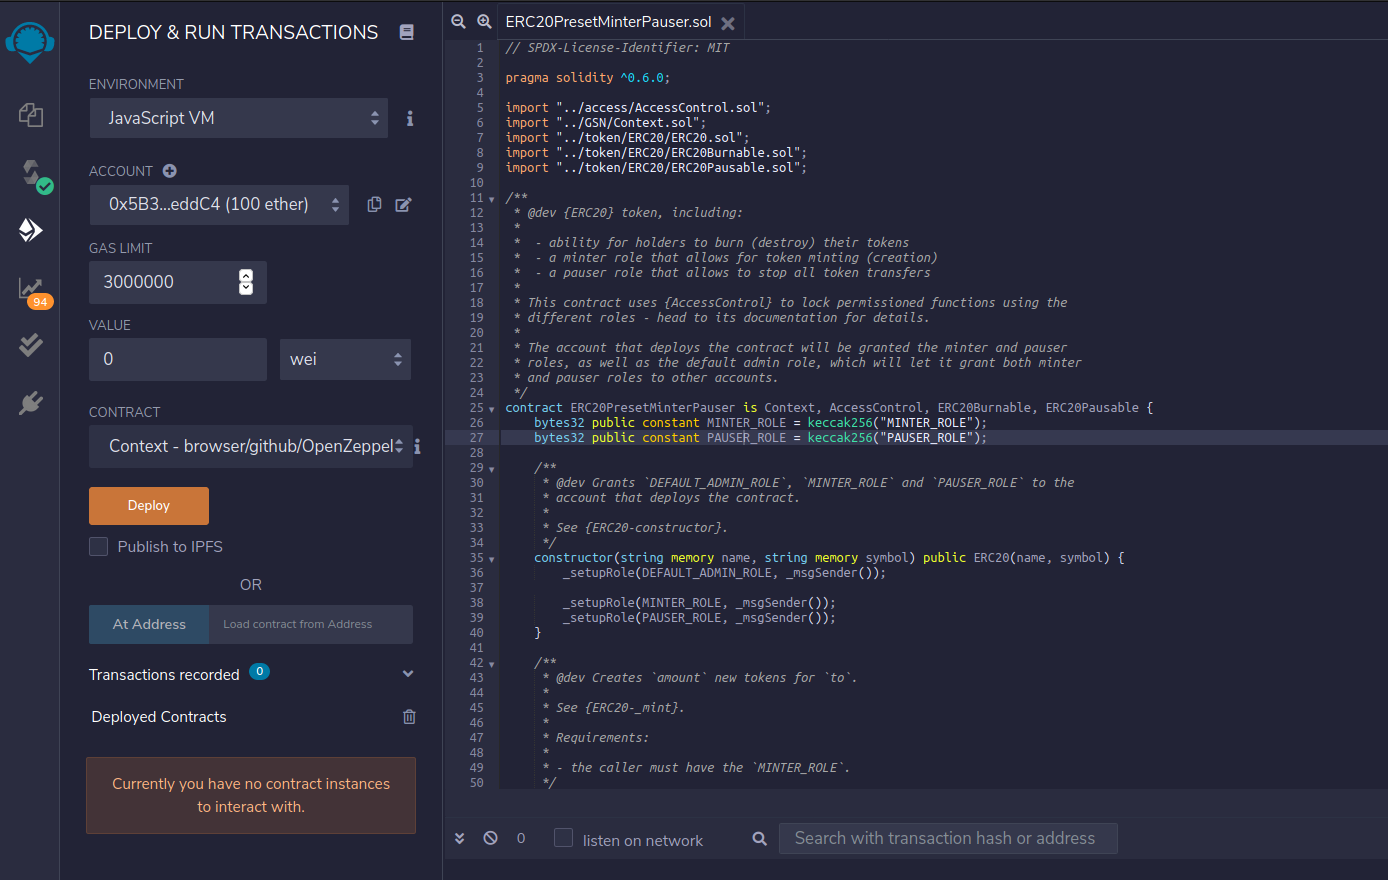
Then, let’s jump to the tab with label Deploy & run transactions. Here before deploying our contract, we should change the environment. Click to the environment and select "Injected Web3". If a pop-up shows up and asks you to connect the account, click to connect. After, you should see the account address in the "ACCOUNT" textbox.
The last thing before the deployment process is to set the contract that will be deployed as a token. Above the Deploy Button, there is a drop-down menu to select a contract. Select the contract named "ERC20PresetMinterPauser.sol".
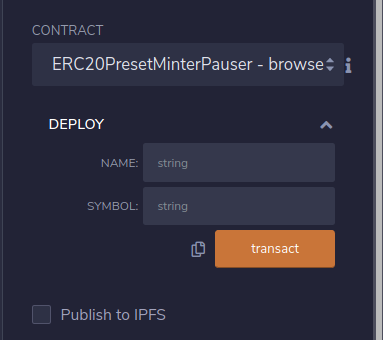
Now, here enter the name and symbol of your token. I will name it "test" and the symbol will be "tst". You can give it a and click to transact button.
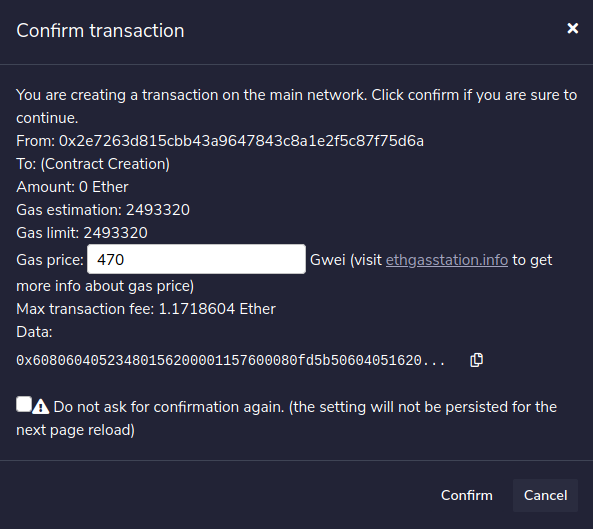
After clicking the button, a pop-up will show up and just confirm it.
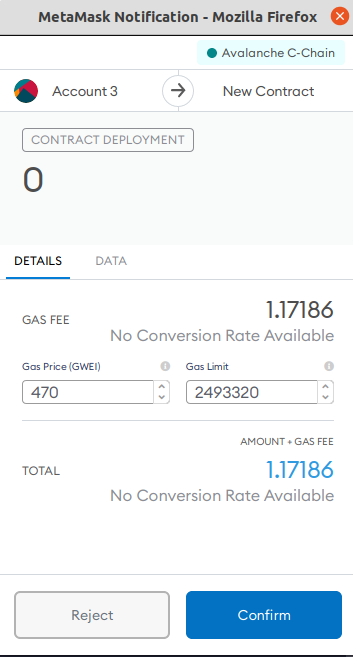
And then another pop-up, a metamask confirmation, appears. Confirm it.
After confirming all these pop-ups we have deployed our token to avalanche C-Chain. So we can start to interact with it.
Interact with Token
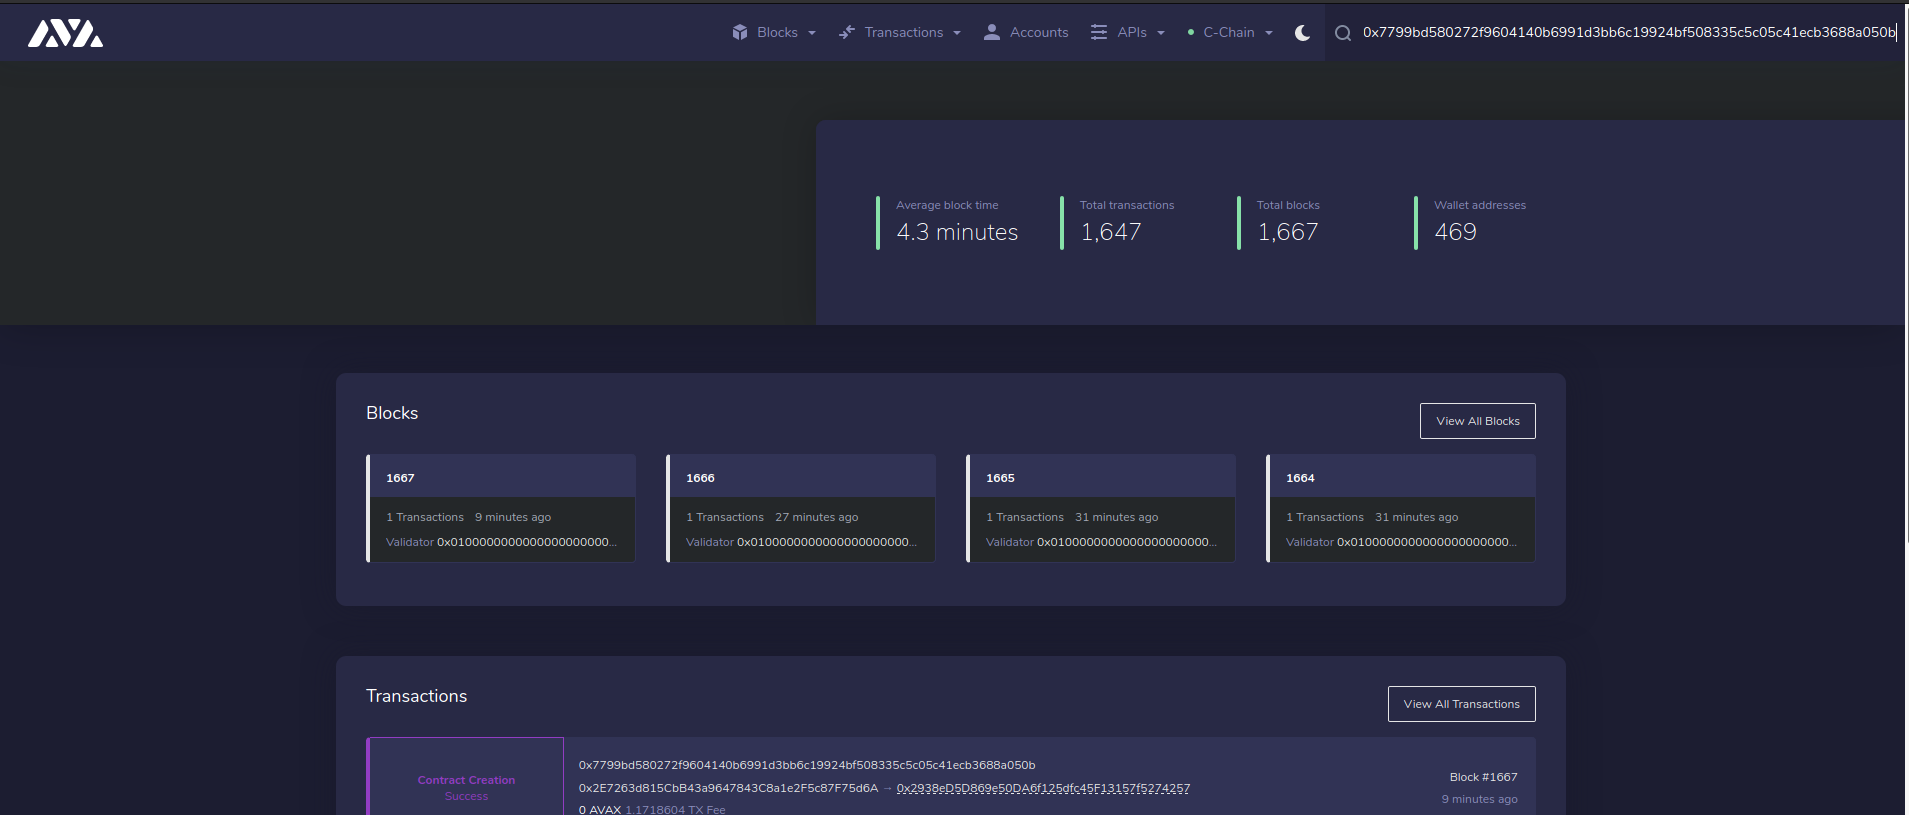
We can see our transaction that deployed on avalanche C-Chain via this c-chain explorer.
But firstly, let’s see our transaction hash from the remix console.
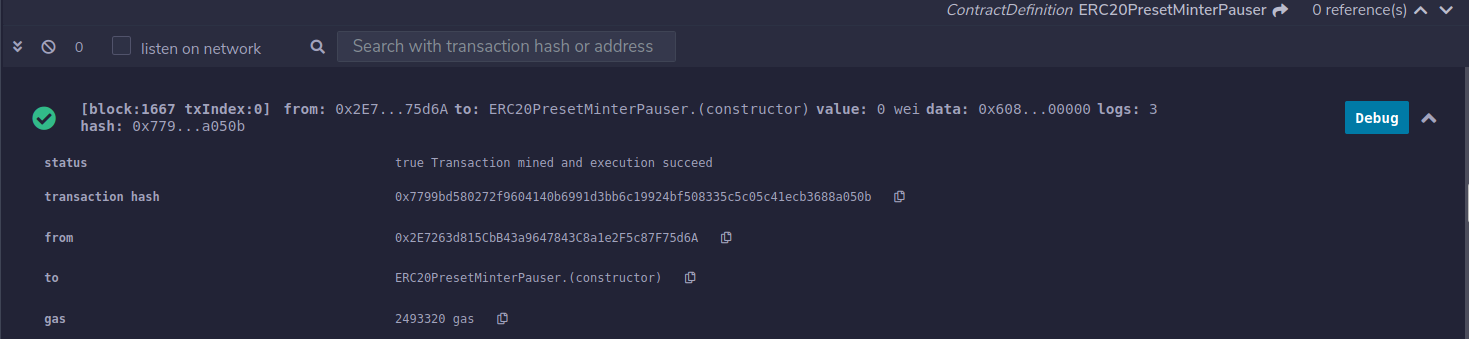
After deploying the contract, we should see a log in remix console. When you click to arrow and expand it, a transaction hash will come up. Copy it.
Just paste the transaction hash to the explorer I shared above and press enter.
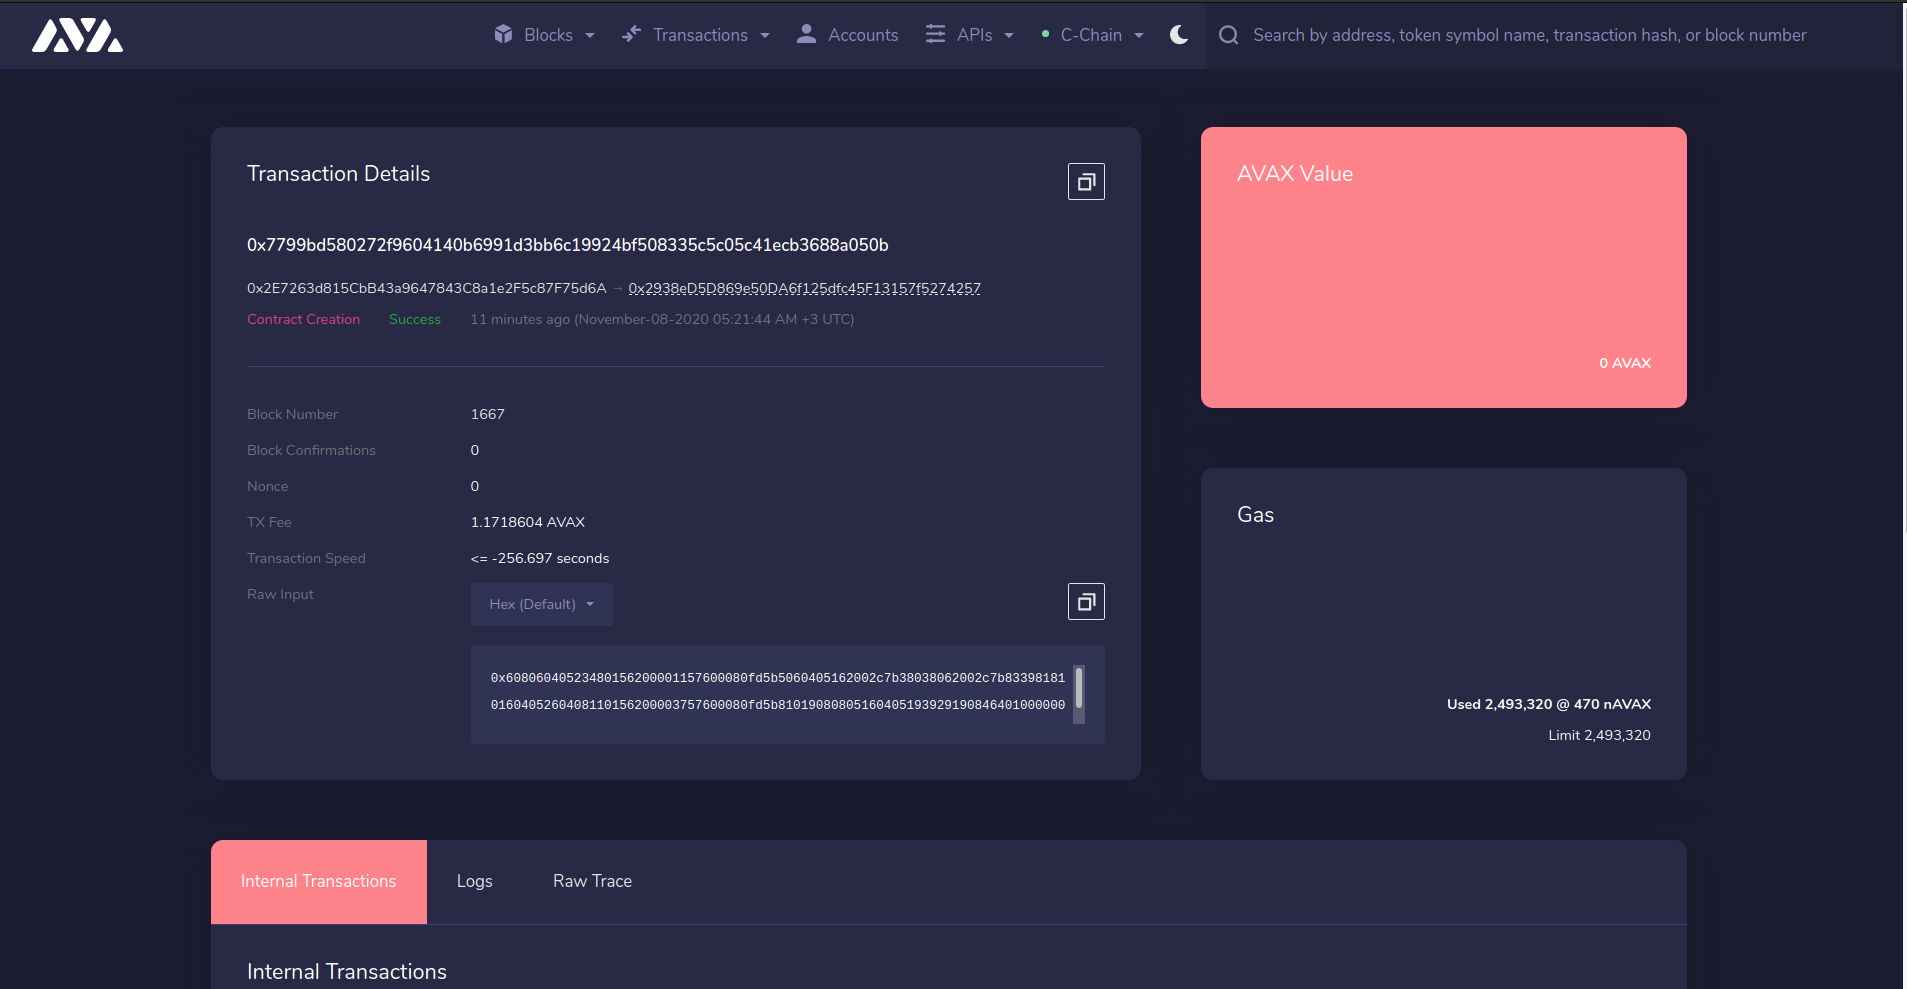
Here we can see all details about the transaction and token contract.

The first one is my wallet address that creates token and the second address is my token contract address which is named "test". Now, let’s mint some token to our own address.
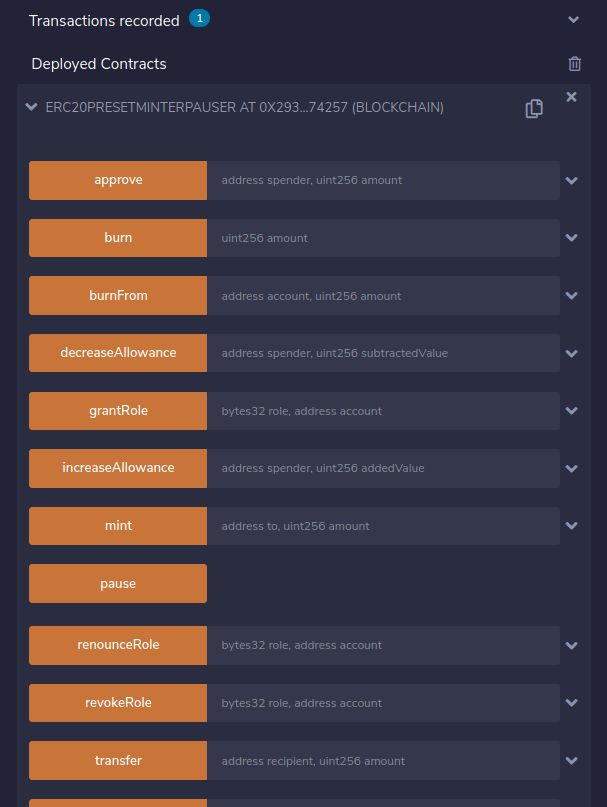
Come back to the remix and after deploying, you should be able to see the contract in "Deployed Contracts" section.
Here, we have a bunch of functions that we can use to interact with our token contract. You can check all these methods from OpenZeppelin documentation to learn how to use them. But we will only use the mint method.
Click to arrow beside the mint method to read it.
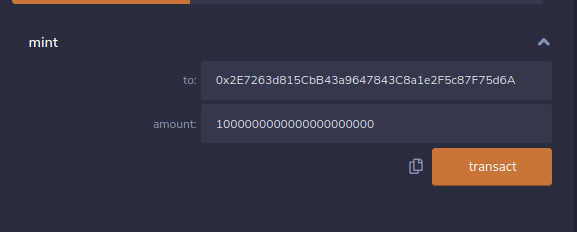
Enter your address and an amount in WEI. For example, I will mint 1000 tst token so, I entered "1000000000000000000000"
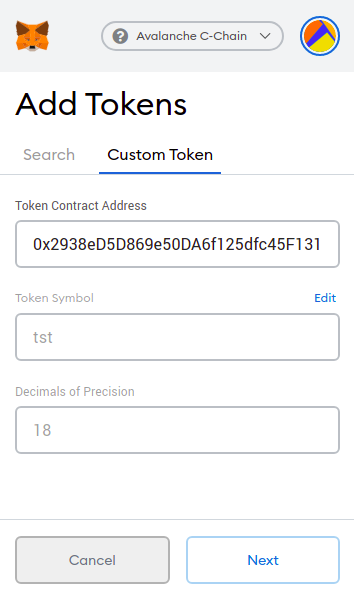
Add Token to Metamask
Now we minted 1000 token to our contract, but you should not be able to see the tokens in your metamask wallet. In order to see our own token, we have to add it. On metamask, click to "Add Token" button and select "Custom Token" tab.
Here enter the token address that you can see from explorer as I showed above. Copy and paste it here. Then click on the Next button, you should see 1000 token that you named in your metamask wallet. Also, you can send it to another account via either remix or metamask.