Create an EVM Subnet on a Local Network
To learn how to develop a Subnet, the first step is to create a local Subnet so that you can experience it freely without too much constraints. Avalanche-CLI provides such a utility.
Avalanche-CLI is very early in its lifecycle. It will evolve rapidly over the coming weeks and months. Until we achieve our first mature release, we are not committed to preserving backwards compatibility. Commands may be renamed or removed in future versions. Examples and their output may become outdated. Please check this page and the github project often and run through the commands to experience them.
Installation
To download a binary for the latest release, run:
curl -sSfL https://raw.githubusercontent.com/ava-labs/avalanche-cli/main/scripts/install.sh | sh -s
The binary will be installed inside the ./ directory (relative to where the install command was run).
Downloading binaries from the Github UI will cause permission errors when running it the first time on Mac.
To add the binary to your path, run
cd bin
export PATH=$PWD:$PATH
To add it to your path permanently, add an export command to your shell initialization script (ex: .bashrc).
Installing in Custom Location
To download the binary into a specific directory, run:
curl -sSfL https://raw.githubusercontent.com/ava-labs/avalanche-cli/main/scripts/install.sh | sh -s -- -b <relative directory>
Quickstart
After installing, launch your own custom Subnet:
curl -sSfL https://raw.githubusercontent.com/ava-labs/avalanche-cli/main/scripts/install.sh | sh -s
cd bin
export PATH=$PWD:$PATH
avalanche subnet create <subnetName>
avalanche subnet deploy <subnetName>
Shut down your local deployment with:
avalanche network stop
Restart your local deployment (from where you left off) with:
avalanche network start
Docker
To make Avalanche CLI working in a docker, add this
{
  "ipv6": true,
  "fixed-cidr-v6": "fd00::/80"
}
to /etc/docker/daemon.json on the host, then restart the docker service. This is because ipv6 is used to resolve local bootstrap IPs, and it is not enabled on a docker container by default.
Currently Supported Functionality
- Creation of Subnet-EVM configs and Subnet-EVM forks
- Local deployment of Subnet-EVM based Subnets
- Fuji deployment of Subnet-EVM based Subnets
Notable Missing Features
- Mainnet Subnet-EVM deploys
Subnet
The Subnet command suite provides a collection of tools for developing and deploying Subnets.
To get started, use the avalanche subnet create command wizard to walk through the configuration of your very first Subnet. Then, go ahead and deploy it with the avalanche subnet deploy command. You can use the rest of the commands to manage your subnet configurations.
Subnet-EVM
Subnet-EVM is a configurable Ethereum virtual machine designed for Subnets. It supports airdrops, custom fee tokens, configurable gas parameters, and multiple stateful precompiles. To learn more, check out the github project.
Create a Custom Subnet Configuration
avalanche subnet create <subnetName>
If you don't provide any arguments, the Subnet creation wizard will walk you through the entire process. This will create a genesis file for your network. It contains all of the information you need to airdrop tokens, set a gas config, and enable any custom precompiles. You can read more about Subnet configuration here.
Example:
Command avalanche subnet create firstsubet walks through following questions:
- Choose a VM: default to SubnetEVM
- Pick a chain ID
- Set fees: default to Avalanche C-Chain's setting
- Airdrop: default to airdrop 1 million tokens
- Add a custom precompile to modify the EVM: default to no.
The wizard won't customize every aspect of the Subnet-EVM genesis for you. If you'd like complete control, you can specify a custom genesis by providing a path to the file you'd like to use. Run with:
avalanche subnet create <subnetName> --file <filepath>
One special note: Every EVM-based chain has a parameter called the chainId. When choosing a chainId for your network, you should choose a unique value. Check chainlist.org to see if the value you'd like is already in use.
By default, creating a Subnet configuration with the same subnetName as one that already exists will fail. To overwrite an existing config, use the force flag:
avalanche subnet create <existingSubnetName> -f
View Created Subnet Configurations
You can list the Subnets you've created with
avalanche subnet list
Example:
> avalanche subnet list
+-------------+-------------+-----------+
|   SUBNET    |    CHAIN    |   TYPE    |
+-------------+-------------+-----------+
| firstsubnet | firstsubnet | SubnetEVM |
+-------------+-------------+-----------+
To see the details of a specific configuration, run
avalanche subnet describe <subnetName>
Example:
> avalanche subnet describe firstsubnet

 _____       _        _ _
|  __ \     | |      (_) |
| |  | | ___| |_ __ _ _| |___
| |  | |/ _ \ __/ _  | | / __|
| |__| |  __/ || (_| | | \__ \
|_____/ \___|\__\__,_|_|_|___/
+-------------+-------------+
|  PARAMETER  |    VALUE    |
+-------------+-------------+
| Subnet Name | firstsubnet |
+-------------+-------------+
| ChainId     |       12345 |
+-------------+-------------+

  _____              _____             __ _
 / ____|            / ____|           / _(_)
| |  __  __ _ ___  | |     ___  _ __ | |_ _  __ _
| | |_ |/ _  / __| | |    / _ \| '_ \|  _| |/ _  |
| |__| | (_| \__ \ | |___| (_) | | | | | | | (_| |
 \_____|\__,_|___/  \_____\___/|_| |_|_| |_|\__, |
                                             __/ |
                                            |___/
+--------------------------+-------------+
|      GAS PARAMETER       |    VALUE    |
+--------------------------+-------------+
| GasLimit                 |     8000000 |
+--------------------------+-------------+
| MinBaseFee               | 25000000000 |
+--------------------------+-------------+
| TargetGas                |    15000000 |
+--------------------------+-------------+
| BaseFeeChangeDenominator |          36 |
+--------------------------+-------------+
| MinBlockGasCost          |           0 |
+--------------------------+-------------+
| MaxBlockGasCost          |     1000000 |
+--------------------------+-------------+
| TargetBlockRate          |           2 |
+--------------------------+-------------+
| BlockGasCostStep         |      200000 |
+--------------------------+-------------+

          _         _
    /\   (_)       | |
   /  \   _ _ __ __| |_ __ ___  _ __
  / /\ \ | | '__/ _  | '__/ _ \| '_ \
 / ____ \| | | | (_| | | | (_) | |_) |
/_/    \_\_|_|  \__,_|_|  \___/| .__/
                               | |
                               |_|
+--------------------------------------------+------------------------+---------------------------+
|                  ADDRESS                   | AIRDROP AMOUNT (10^18) |   AIRDROP AMOUNT (WEI)    |
+--------------------------------------------+------------------------+---------------------------+
| 0x8db97C7cEcE249c2b98bDC0226Cc4C2A57BF52FC |                1000000 | 1000000000000000000000000 |
+--------------------------------------------+------------------------+---------------------------+


  _____                                    _ _
 |  __ \                                  (_) |
 | |__) | __ ___  ___ ___  _ __ ___  _ __  _| | ___  ___
 |  ___/ '__/ _ \/ __/ _ \| '_   _ \| '_ \| | |/ _ \/ __|
 | |   | | |  __/ (_| (_) | | | | | | |_) | | |  __/\__ \
 |_|   |_|  \___|\___\___/|_| |_| |_| .__/|_|_|\___||___/
                                    | |
                                    |_|

No precompiles set
If you'd like to see the raw genesis file, supply the --genesis flag:
avalanche subnet describe <subnetName> --genesis
Example:
> avalanche subnet describe firstsubnet --genesis
{
    "config": {
        "chainId": 12345,
        "homesteadBlock": 0,
        "eip150Block": 0,
        "eip150Hash": "0x2086799aeebeae135c246c65021c82b4e15a2c451340993aacfd2751886514f0",
        "eip155Block": 0,
        "eip158Block": 0,
        "byzantiumBlock": 0,
        "constantinopleBlock": 0,
        "petersburgBlock": 0,
        "istanbulBlock": 0,
        "muirGlacierBlock": 0,
        "subnetEVMTimestamp": 0,
        "feeConfig": {
            "gasLimit": 8000000,
            "targetBlockRate": 2,
            "minBaseFee": 25000000000,
            "targetGas": 15000000,
            "baseFeeChangeDenominator": 36,
            "minBlockGasCost": 0,
            "maxBlockGasCost": 1000000,
            "blockGasCostStep": 200000
        },
        "contractDeployerAllowListConfig": {
            "blockTimestamp": null,
            "adminAddresses": null
        },
        "contractNativeMinterConfig": {
            "blockTimestamp": null,
            "adminAddresses": null
        },
        "txAllowListConfig": {
            "blockTimestamp": null,
            "adminAddresses": null
        }
    },
    "nonce": "0x0",
    "timestamp": "0x0",
    "extraData": "0x",
    "gasLimit": "0x7a1200",
    "difficulty": "0x0",
    "mixHash": "0x0000000000000000000000000000000000000000000000000000000000000000",
    "coinbase": "0x0000000000000000000000000000000000000000",
    "alloc": {
        "8db97c7cece249c2b98bdc0226cc4c2a57bf52fc": {
            "balance": "0xd3c21bcecceda1000000"
        }
    },
    "airdropHash": "0x0000000000000000000000000000000000000000000000000000000000000000",
    "airdropAmount": null,
    "number": "0x0",
    "gasUsed": "0x0",
    "parentHash": "0x0000000000000000000000000000000000000000000000000000000000000000",
    "baseFeePerGas": null
}
Deploying Subnets Locally
Currently, this tool only supports local Subnet deploys. Fuji and Mainnet deploys will be arriving shortly.
To deploy, run
avalanche subnet deploy <subnetName>
Local deploys will start a multi-node Avalanche network in the background on your machine. Progress will be shown until it completes. It also prints info needed for connecting with Metamask.
Example:
> avalanche subnet deploy firstsubnet
✔ Local Network
Deploying [firstsubnet] to Local Network
Backend controller started, pid: 71505, output at: /var/folders/0h/v4nrbbsn1vvbr5h2wfrh5h500000gn/T/avalanche-cli-backend57656025
Avalanchego installation successful
dialing endpoint ":8097"
VM ready. Trying to boot network...
Network has been booted. Wait until healthy. Please be patient, this will take some time...
...............................................................................
Network ready to use. Local network node endpoints:
Endpoint at node node4 for blockchain "n6yXZSaNXCvh6BUTJ2fgyc4iDxoz21NVaVgY3N4sSpTGMqJzc": http://127.0.0.1:63196/ext/bc/2GAinA2PAEEEnuy1yTeqgqCbQWUGFTvUaiDSRiZgMrRRoLYs92/rpc
Endpoint at node node5 for blockchain "n6yXZSaNXCvh6BUTJ2fgyc4iDxoz21NVaVgY3N4sSpTGMqJzc": http://127.0.0.1:49912/ext/bc/2GAinA2PAEEEnuy1yTeqgqCbQWUGFTvUaiDSRiZgMrRRoLYs92/rpc
Endpoint at node node1 for blockchain "n6yXZSaNXCvh6BUTJ2fgyc4iDxoz21NVaVgY3N4sSpTGMqJzc": http://127.0.0.1:47497/ext/bc/2GAinA2PAEEEnuy1yTeqgqCbQWUGFTvUaiDSRiZgMrRRoLYs92/rpc
Endpoint at node node2 for blockchain "n6yXZSaNXCvh6BUTJ2fgyc4iDxoz21NVaVgY3N4sSpTGMqJzc": http://127.0.0.1:62099/ext/bc/2GAinA2PAEEEnuy1yTeqgqCbQWUGFTvUaiDSRiZgMrRRoLYs92/rpc
Endpoint at node node3 for blockchain "n6yXZSaNXCvh6BUTJ2fgyc4iDxoz21NVaVgY3N4sSpTGMqJzc": http://127.0.0.1:48498/ext/bc/2GAinA2PAEEEnuy1yTeqgqCbQWUGFTvUaiDSRiZgMrRRoLYs92/rpc

Metamask connection details (any node URL from above works):
RPC URL:          http://127.0.0.1:63196/ext/bc/2GAinA2PAEEEnuy1yTeqgqCbQWUGFTvUaiDSRiZgMrRRoLYs92/rpc
Funded address:   0x8db97C7cEcE249c2b98bDC0226Cc4C2A57BF52FC with 1000000 (10^18) - private key: 56289e99c94b6912bfc12adc093c9b51124f0dc54ac7a766b2bc5ccf558d8027
Network name:     firstsubnet
Chain ID:         12345
Currency Symbol:  TEST
To manage that network, see the avalanche network command tree.
Deploying to Fuji
If you can't wait to for this tool's Fuji integration, you can use the subnet-cli tool to deploy your Subnet.
First, export your Subnet's genesis file with avalanche subnet describe --genesis <subnetName>. Then, use that genesis file to complete the instructions listed here.
Delete a Subnet Configuration
To delete a created Subnet configuration, run
avalanche subnet delete <subnetName>
Network
The network command suite provides a collection of tools for managing local Subnet deployments.
When a Subnet is deployed locally, it runs on a local, multi-node Avalanche network. Deploying a Subnet locally will start this network in the background. This command suite allows you to shutdown and restart that network.
This network currently supports multiple, concurrently deployed Subnets and will eventually support nodes with varying configurations. Expect more functionality in future releases.
Stopping the Local Network
To stop a running local network, run
avalanche network stop [snapshotName]
This graceful shutdown will preserve network state. When restarted, your Subnet should resume at the same place it left off.
snapshotName is optional, if provided, a named snapshot will be created which can later be started again with avalanche network start snapshotName.
If not provided, a default snapshot will be created. The default snapshot will be overwritten at each stop.
Example:
> avalanche network stop
dialing endpoint ":8097"
Network stopped successfully.
Starting/Restarting the Local Network
To start or restart a stopped network, run
avalanche network start [snapshotName]
snapshotName is optional, if provided the named snapshot will be used to start the network (if found).
If not provided, the last snapshot created with a unnamed stop will be used.
If the default snapshot doesn't exist (because no stop has been run yet, and/or no Subnet has been deployed yet), the command will fail.
Deploying a Subnet locally will start the network automatically.
Example:
> avalanche network start
dialing endpoint ":8097"
Starting previously deployed and stopped snapshot
.....................
Network ready to use. Local network node endpoints:
Endpoint at node node3 for blockchain "n6yXZSaNXCvh6BUTJ2fgyc4iDxoz21NVaVgY3N4sSpTGMqJzc": http://127.0.0.1:48498/ext/bc/2GAinA2PAEEEnuy1yTeqgqCbQWUGFTvUaiDSRiZgMrRRoLYs92/rpc
Endpoint at node node4 for blockchain "n6yXZSaNXCvh6BUTJ2fgyc4iDxoz21NVaVgY3N4sSpTGMqJzc": http://127.0.0.1:63196/ext/bc/2GAinA2PAEEEnuy1yTeqgqCbQWUGFTvUaiDSRiZgMrRRoLYs92/rpc
Endpoint at node node5 for blockchain "n6yXZSaNXCvh6BUTJ2fgyc4iDxoz21NVaVgY3N4sSpTGMqJzc": http://127.0.0.1:49912/ext/bc/2GAinA2PAEEEnuy1yTeqgqCbQWUGFTvUaiDSRiZgMrRRoLYs92/rpc
Endpoint at node node1 for blockchain "n6yXZSaNXCvh6BUTJ2fgyc4iDxoz21NVaVgY3N4sSpTGMqJzc": http://127.0.0.1:47497/ext/bc/2GAinA2PAEEEnuy1yTeqgqCbQWUGFTvUaiDSRiZgMrRRoLYs92/rpc
Endpoint at node node2 for blockchain "n6yXZSaNXCvh6BUTJ2fgyc4iDxoz21NVaVgY3N4sSpTGMqJzc": http://127.0.0.1:62099/ext/bc/2GAinA2PAEEEnuy1yTeqgqCbQWUGFTvUaiDSRiZgMrRRoLYs92/rpc
Deleting the Local Network
To stop your local network and clear its state, run
avalanche network clean
This will delete all stored deploy state for all local Subnet deployments. This will not delete any of your Subnet configurations. You will need to redeploy your Subnet configurations one by one to use them again.
Example:
> avalanche network clean
dialing endpoint ":8097"
Process terminated.
Checking Network Status
If you'd like to determine whether or not a local Avalanche network is running on your machine, run
avalanche network status
Connect with Metamask
Please use the value provided by Metamask connection details to connect with Metamask.
Metamask connection details (any node URL from above works):
RPC URL:          http://127.0.0.1:63196/ext/bc/2GAinA2PAEEEnuy1yTeqgqCbQWUGFTvUaiDSRiZgMrRRoLYs92/rpc
Funded address:   0x8db97C7cEcE249c2b98bDC0226Cc4C2A57BF52FC with 1000000 (10^18) - private key: 56289e99c94b6912bfc12adc093c9b51124f0dc54ac7a766b2bc5ccf558d8027
Network name:     firstsubnet
Chain ID:         12345
Currency Symbol:  TEST
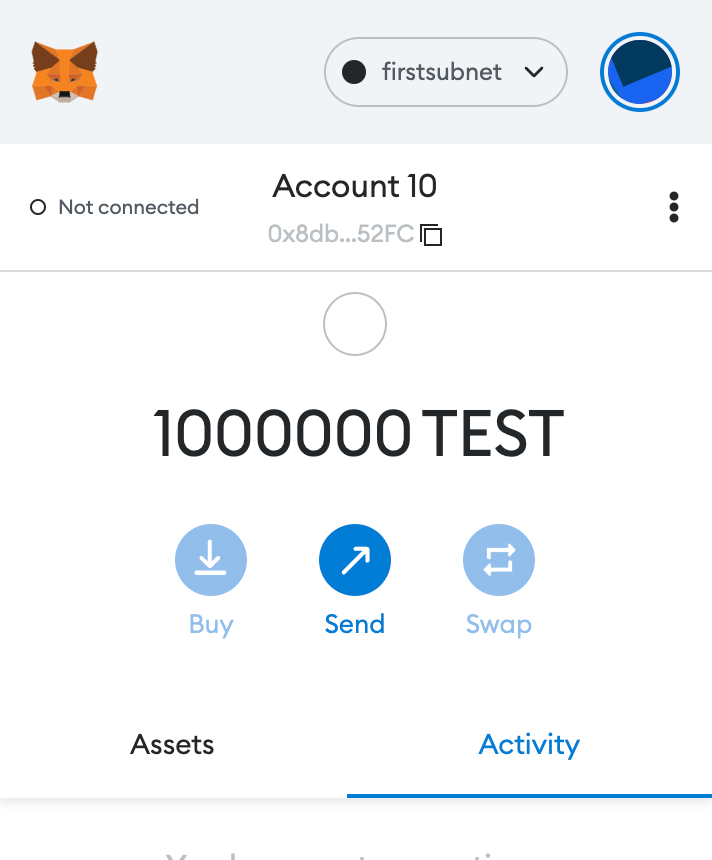
You can create a new metamask account by importing the private key 0x56289e99c94b6912bfc12adc093c9b51124f0dc54ac7a766b2bc5ccf558d8027 and start experiencing with this account.
Here is a screenshot of Metamask when everything is set correctly:
Smart Contract
You can use this newly created Subnet just like you use C-Chain and EVM tools. Only differences are chainID and RPC URL. For example you can follow this article to Deploy a Smart Contract on Your Subnet EVM Using Remix and Metamask. Or you can deploy your contracts with hardhat quick start guide by changing url and chainId in the hardhat.config.ts.
For example: to connect Hardhat to the local network that deployed with the Avalanche-CLI, we would create a network setting in hardhat.config.ts that looks similar to this:
testChain: {
      url: "http://127.0.0.1:63196/ext/bc/2GAinA2PAEEEnuy1yTeqgqCbQWUGFTvUaiDSRiZgMrRRoLYs92/rpc",
      chainId: 12345,
      accounts: ["<YOUR-PRIVATE-KEY-HERE>"],
    }
Next Step
After you feel comfortable moving forward, you should try it on the Fuji Testnet by following this tutorial.